Operational process
The operational flow starts with an employee uploading a receipt in Circula and ends with a posted general-ledger entry in Business Central. The following pages walk through the complete end-to-end flow using a split receipt (7 % and 19 %) as an example.
Capture a receipt in Circula (employee)
The employee opens the Circula app and creates a new expense. The receipt photo or PDF is dragged and dropped into the entry window; Circula reads the receipt automatically.
Then the employee fills in the following fields:
Merchant – usually detected automatically.
Invoice date – date of the receipt.
Amount / Currency – amount and currency.
Category – determines the G/L account that will later be selected in Business Central (e.g. “Other”).
Purpose – short business reason (e.g. “Test 30.04.2026”).
Project – project assignment (optional).
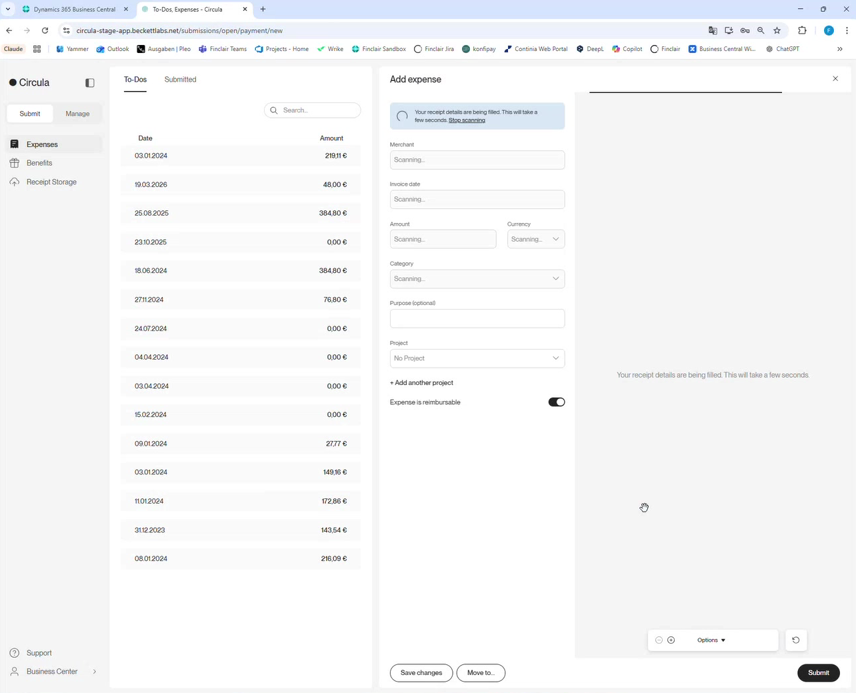
After “Submit” the expense moves into the approval workflow.
Approval workflow and split posting
In Circula the expense passes through several stages:
Pending approval – The manager reviews the expense from a budget perspective and approves it.
Pending controlling – Accounting checks the coding. If required the receipt can be split here, e.g. into 7 % and 19 % VAT, and the cost center / cost unit can be adjusted again.
Expense export – After Controlling has released the expense, it sits in the “Expense export” tile and waits to be picked up by Business Central.
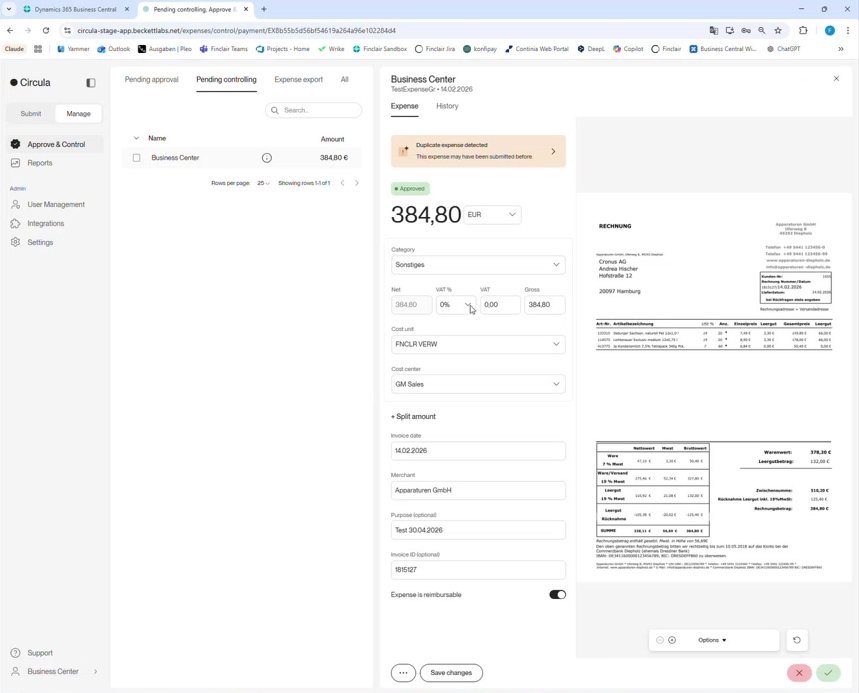
Tipp
How to do the split: In the “Net / VAT % / VAT / Gross” area, first enter the 19 % portion. Use “+ Split amount” to add the second line at 7 %. Circula automatically splits the receipt into two correctly typed positions.
Pull expenses into Business Central
The Business Central role center contains the central actions and tiles in the “Circula Expenses” area:
Action “Request Expenses” – pulls released receipts from Circula.
Action “Expenses” – opens the expense buffer with the retrieved receipts.
Action “Setup” – jumps into the Circula Setup page.
Action “Process Log” – log of every change, for example to vendor master data.
Tiles “API entries / errors” and “Expense entries / errors” – status overview of open and erroneous items.
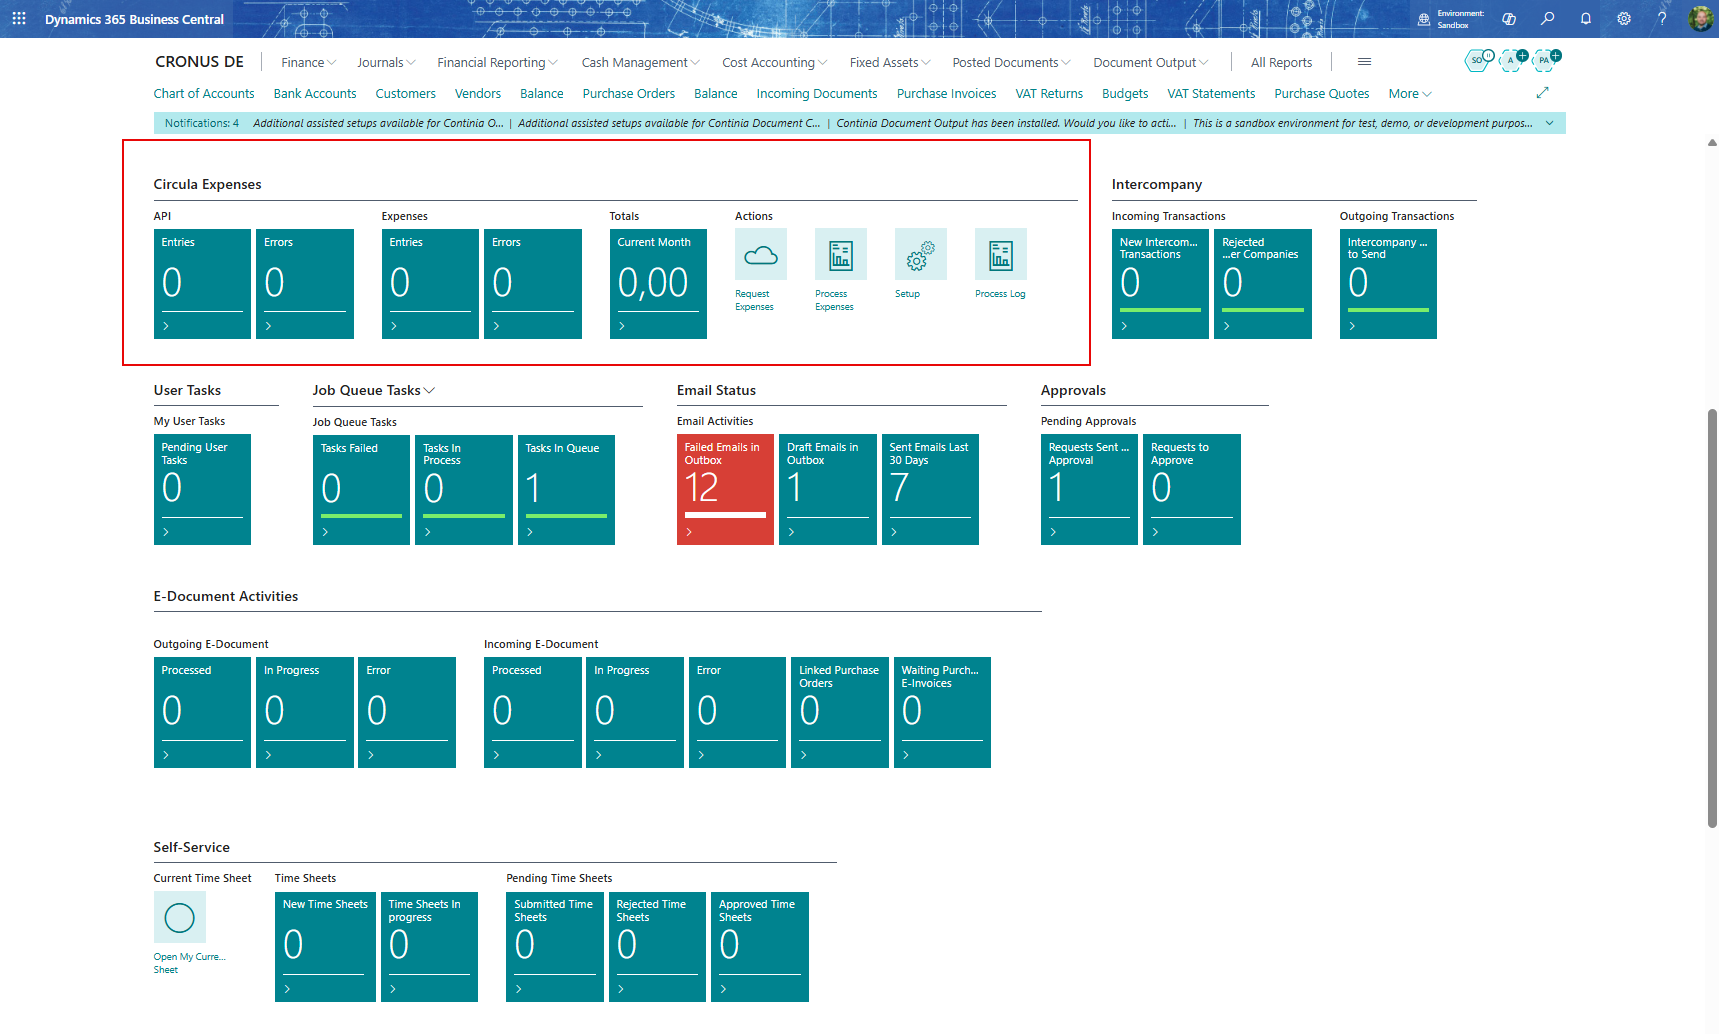
Click “Request Expenses” to pull released receipts from Circula manually. With an active job queue (section 1.4) this step is no longer needed.
Processing in the Circula expense buffer
The “Expenses” tile opens the Circula expense buffer. The retrieved receipts appear here as entries.
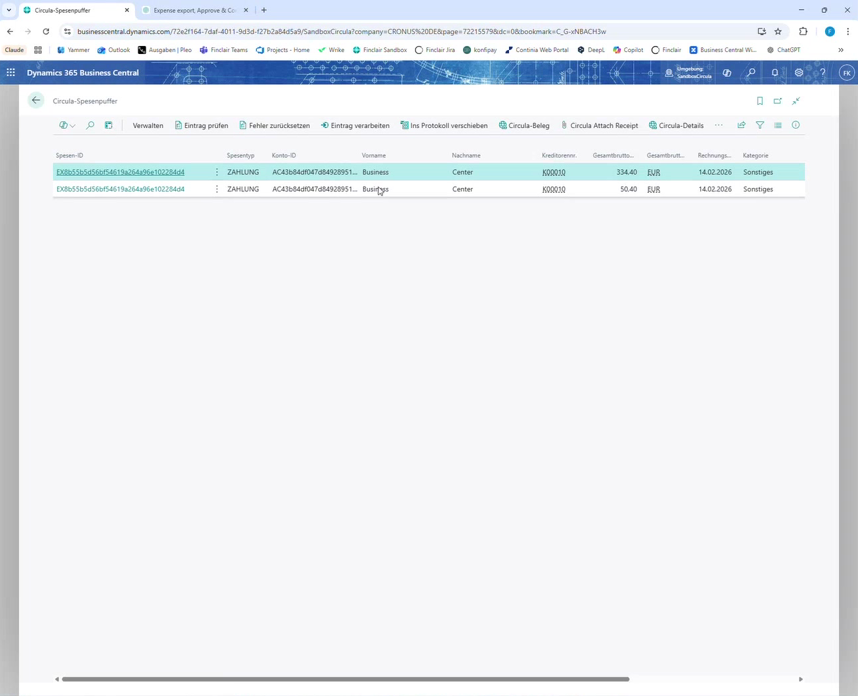
Select the desired lines and click “Process Entry”. The status typically passes through three stages:
Pending – entry has just been imported.
Ready – entry has been processed and is waiting to be transferred to the journal.
Transferred – entry has been written to the general journal.
When transferring to the general journal the system asks whether the handover should run as “Independent” (one vendor line per VAT rate) or as “Vendor Batch” (one vendor line, multiple G/L lines). With the recommended “Vendor Batch” setting from the configuration the choice is preselected.
Notiz
From the toolbar of the expense buffer you can also use “Circula Receipt” (shows the original receipt via a link in Circula), “Circula Attach Receipt” (attach a receipt) and “Circula Details” (technical detail data of the entry). The actual receipts remain stored in Circula in an audit-proof manner; Business Central only displays them through a link, which keeps storage costs in the BC database low.
Reviewing the general journal
Open the general journal with the journal-batch name “CIRCULA”. The transferred receipts appear with the configured posting description and the prefix in the external document number (e.g. “INVC_K00010_433”).
Per receipt you typically see three lines:
1× vendor line for the gross amount
2× G/L account lines for the respective VAT rates (e.g. 7 % and 19 %)
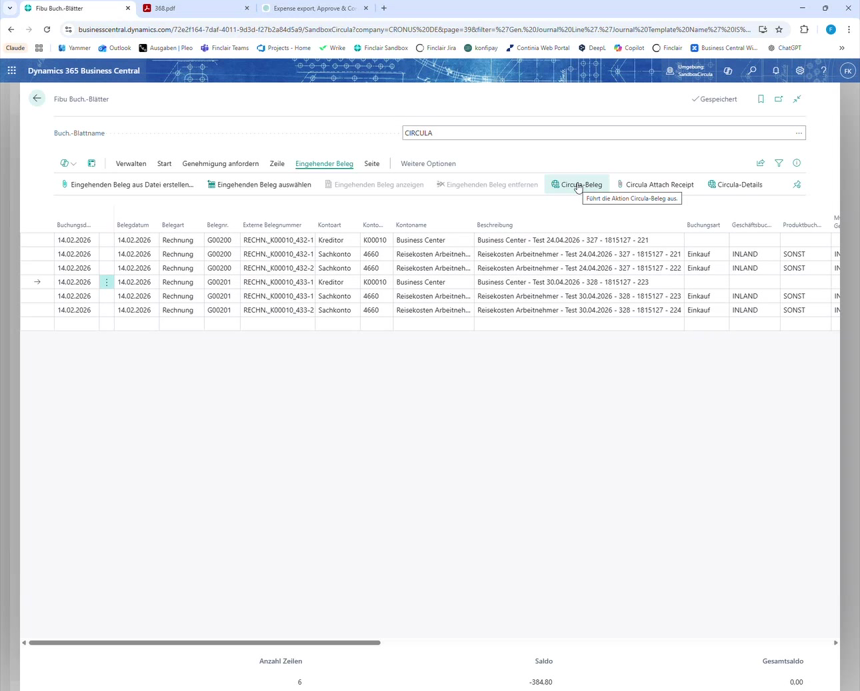
Use “Incoming Document → Circula Receipt” to open the original receipt directly from the journal and check whether the transferred data matches the invoice. The dimensions (cost center, cost unit) are already populated.
Tipp
The “Show Totals” action at the top of the journal shows gross and net totals on the last line before posting.
Post and verify the G/L entries
When everything is correct, post the journal as usual. The posted values can then be checked in the G/L entries:
From the role center, navigate back to the expense buffer via the “Expenses” tile.
Mark the previously transferred line and click “Open G/L Entries”.
The G/L entries show the posted document with posting date, amount and dimensions.
From here, “Circula Receipt” can again be used to open the original receipt at any time.
That completes the full flow: From the receipt upload in Circula by the employee, all the way to a fully posted G/L entry in Business Central with an audit-proof link to the original document, every step runs through the Circula Expenses Connector by Finclair GmbH.